 Install with Gale

🌙 Mists of Avalor



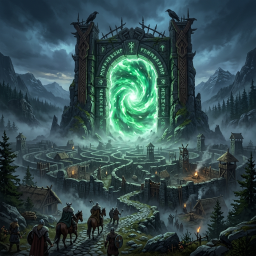
"They say the gods buried something beyond the edge of the world — a labyrinth of black stone that drinks the light. The dead walk its halls still, guarding hoards no living hand was meant to touch. Step through the mist, Viking. Few return. None return the same."
Mists of Avalor casts you into a vast, procedurally-generated crypt-labyrinth suspended in a forsaken sky-realm beyond the edge of Midgard. Every corridor is carved fresh at runtime — black-stone halls hewn from hand-authored geometry, collapsing stairwells, bone-strewn vaults, and pitch-dark dead ends where something is already hunting you. Over it all hangs the cold green witch-light of Avalor, the colour of grave-fire.
Survive the maze. Break the guardians. Tear the keys from their corpses. Crack the sealed crypt-vaults. And at the deepest point of all, where the escape-gate burns, claim the blade that only the conqueror of Avalor may carry — or die in the dark and be forgotten.
⚔️ Features
🌌 A Labyrinth That Is Never the Same Twice
Every run is forged by a recursive procedural generator — a true 3D maze of 6-meter black-stone corridors twisting across multiple vertical floors, stitched together by sloped stairwells that always lead somewhere. Dead ends hide vaults. Open halls hide ambushes. The whole structure is raised in a hidden sky-realm far beyond the world's edge, so it never touches your overworld builds or other mods' terrain.
A fixed, always-solid entrance platform anchors every maze, so you are never dropped into the void — you arrive on solid ground, torch in hand, at the mouth of the dark.
🗿 Halls Carved By Hand, Not Borrowed
Avalor is not dressed in Valheim's stock stonework. The mod ships an embedded asset kit of purpose-built models — three distinct wall faces, three floor patterns, vaulted ceilings, stairs, archways, the twin gate-monoliths and the skull-crowned torches — baked into the plugin itself, so there is no loose bundle to misplace and nothing to install beyond the mod.
Walls are laid two-sided, deduplicated per boundary, and varied by position, so no two corridors read alike and no seam gaps open at the corners. Ceilings close the halls overhead. Should the kit ever fail to load, the labyrinth silently falls back to vanilla stonework rather than leaving you standing in the void.
💀 The Mob Director — the Maze Hunts You
This is no static dungeon. An active Mob Director tracks every player inside the labyrinth and keeps the halls alive with the restless dead — Draugr, Draugr Elite, Draugr Archers, Skeletons, Poison Skeletons, Wraiths and Ghosts (with Charred legions joining on Hardcore).
- 20-second grace on arrival, counted down on screen and ending with "Good luck." Nothing spawns or strikes until you have fully loaded in — no being gutted on a black loading screen.
- The maze empties when you leave. No population is simulated when no one is inside; it wakes when you return.
- Hunted, not patrolled. The dead lock onto your scent the instant they wake. Spawns are biased ahead of your path, so the dark in front of you is never truly empty — and distant stragglers are culled, so the threat stays close.
- Proximity spawners seeded through the arenas wake as you approach, keeping the whole labyrinth populated, not just the entrance.
👹 Sub-Boss Mutations — Mechanical, Merciless
Roughly 1 in 7 of the dead rise as a starred sub-boss — not a recolour, but a genuinely different fight:
| Variant | Curse |
|---|---|
| Goliath | Massively increased health, cannot be staggered — an immovable wall of rot |
| Venomous | Immune to poison |
| Glacial | Immune to frost |
| Vampiric | Resists all physical (blunt, slash & pierce) |
| Lightning | Immune to lightning and unnaturally fast |
Every sub-boss is starred, hardened by difficulty, allied to the undead horde, and roughly one in five carries an Avalor Crypt Key.
🔥 The Revenant — Two Stars
Rarest of all, about one spawn in fifty, something older answers the maze: a two-star Avalorian Revenant — a Draugr Elite, a Charred Warrior or a Poison Skeleton, always sub-boss mutated, always starred twice.
You will know it when it comes. It arrives named, with a green health bar, because rarity you cannot see is indistinguishable from a bug — and the labyrinth is already thick with starred mobs. The rarity is in meeting one, and meeting one is meant to be an event you can see coming.
👑 The Avalorian Warden — the Fight at the End
The escape-gate is guarded. Close within about 34m of the way out and something rises to hold it: the Avalorian Warden, announced by name under a gold health bar.
It is a different champion every labyrinth, drawn from three and then remade into something larger than what it started as:
| Champion | What you are facing |
|---|---|
| Brenna (Skeleton Hildir) | A champion skeleton with a fire nova and a burning sword |
| Lord Reto (Charred Dyrnwyn) | A charred lord wielding Dyrnwyn, a named and self-lit blade of his own |
| Draugr Elite | The straightforward brawl, at boss scale, that makes the other two feel special |
Whichever rises, it is two-starred, cannot be staggered, and carries 3× to 7× its own kind's health depending on difficulty. It guards rather than hunts — it holds the gate area and paces it, and it will fight you the moment you arrive, but it will not be lured back through the labyrinth. Pull it more than about four cells from its post and it disengages and walks home.
It carries the Avalorian Greatsword, and it is the only thing in the world that does. The sword comes off the corpse — guaranteed, one per labyrinth, no roll — alongside a guaranteed Recall Rune (the way home should never be gated behind a roll) and a rolled hoard of gemstones, Surtling Cores, Black Metal, Flametal and a purse of 200–600 coins.
One Warden per labyrinth. Kill it and the way out stays unguarded — that fact is stored on the gate itself, so it survives a relog and a server restart. Only a full maze reset raises a new one.
🏛️ Combat Arenas
The corridors blast open into combat arenas (12×12m up to 24×24m) — bone-pits and pillared halls loaded with corner chests and proximity spawners, built to surround and bury you.
🩸 True-Damage Traps
Armour will not save you here. Hidden spike plates and poison-dart traps both bite for a percentage of your CURRENT health — 40% on Easy up to a savage 85% on Hardcore — so they scale with you and never stop mattering.
The two are not the same, though. Spike plates deal true damage: nothing reduces it. Dart traps deal poison damage, so poison resistance genuinely blunts them — and where the spikes land all at once, the poison drains out of you over the next twenty seconds while you are still trying to get away from it. Because the damage is measured off current health rather than maximum, neither will gib you outright — but a single misstep leaves you gasping on a sliver deep in the dark… with the horde closing in.
🗝️ Crypt Vaults & Keys
Deep in the maze, heavy rusted iron grates seal the richest crypt-vaults. Only an Avalor Crypt Key — torn from a slain sub-boss — will open them. (The entrance and the exit are never sealed — no key-locking you out of your own escape.) Every chest in Avalor is indestructible: no stray AoE, no collapsing hall, no careless blow will ever cost you a hoard.
💎 Hoards That Deepen With the Dark
Wood and resin are worthless in Avalor. Chests spill their wealth in three bands, and how deep you have walked decides which bands you can reach — a chest by the door and a chest at the far end are not the same chest.
| Band | Where it opens up | What the dark gives |
|---|---|---|
| Common | Everywhere | Coins, Amber, Amber Pearls, Iron, Silver, Crystal, Surtling Cores, Linen Thread, Rubies |
| Deeper | Past the first quarter, or any large arena | Black Metal, Refined Eitr, Yggdrasil Wood, Scale Hide, Carapace, Mandibles, Wisps, Soft Tissue, Black Cores, Molten Cores, Black Marble, Bile Bags |
| The Deep Dark | Past 60% of the way in, and every vault | Red, Blue & Green Gemstones, Flametal, Flametal Ore, Ask Hide, Grausten, Sulfur, Proustite Powder, Celestial Feathers, Volture Eggs, Bonemaw Serpent Scale, Morgen Hearts, Jade |
A chest at the threshold rolls three distinct stacks; a vault at the world's end rolls eight. Push past the halfway mark and the deeper band stops being an occasional bonus and becomes the bulk of what you find. Quantities are never fixed — most stacks come in threes to fives, and materials a smith burns by the dozen (cores, ingots, hides, stone) come in eight to twenty-five. Difficulty multiplies it all again (×1 / ×2 / ×3), and depth multiplies it once more.
🗡️ The Avalorian Greatsword — the Conqueror's Prize
You take it off the Warden. There is no chest, no lever and no way around it: the blade is a guaranteed drop from the thing standing between you and the way out, and it drops always — no roll, no chance, no cruelty. One greatsword per labyrinth.
A great two-handed blade, and it will not stay still. Small dark-green runes bleed off the steel and fall away from it — a slow drip while it rests across your back, a scattering trail of glyphs hanging in the air behind every swing. It carries its own faint green light, which in a labyrinth that can be set to absolute pitch black is worth more than any number on a stat sheet. To carry it is to be changed:
- +100 maximum health and +100 maximum stamina while wielded — the maze's own strength, given back to the one who broke it
- Heavier slash than the blade it was raised from
- A quarter of its weight again in spirit damage — death's own edge, for a realm made of the dead
- Four levels of refinement, and durability to match
It is not simply a better sword. It is the sword you carry into graves.
🕯️ Green Fire and Living Gloom
Avalor's murk is not painted on and forgotten — it is driven live, every frame. Fog, ambient light, torchlight and the drifting mist all answer your settings the instant you change them, with no regeneration required. Set the mist to None and the halls truly clear — even the environment's own drifting motes are stilled. Set the light to None and the labyrinth goes genuinely, unnavigably black.
There is no fire in Avalor. Every torch is a skull-crowned pillar whose skull glows Avalor green — a steady, unwavering witch-light, not a flame. No flicker, no embers, no smoke: the same cold green as the gate and as the runes on the blade, one realm, one colour, from the threshold to the deepest vault. The sky-realm also forces its own crypt weather, so no Ashlands sky ever bleeds through, and vegetation is skipped beneath the maze entirely to keep the frames high.
⚰️ The Gate of Two Stones
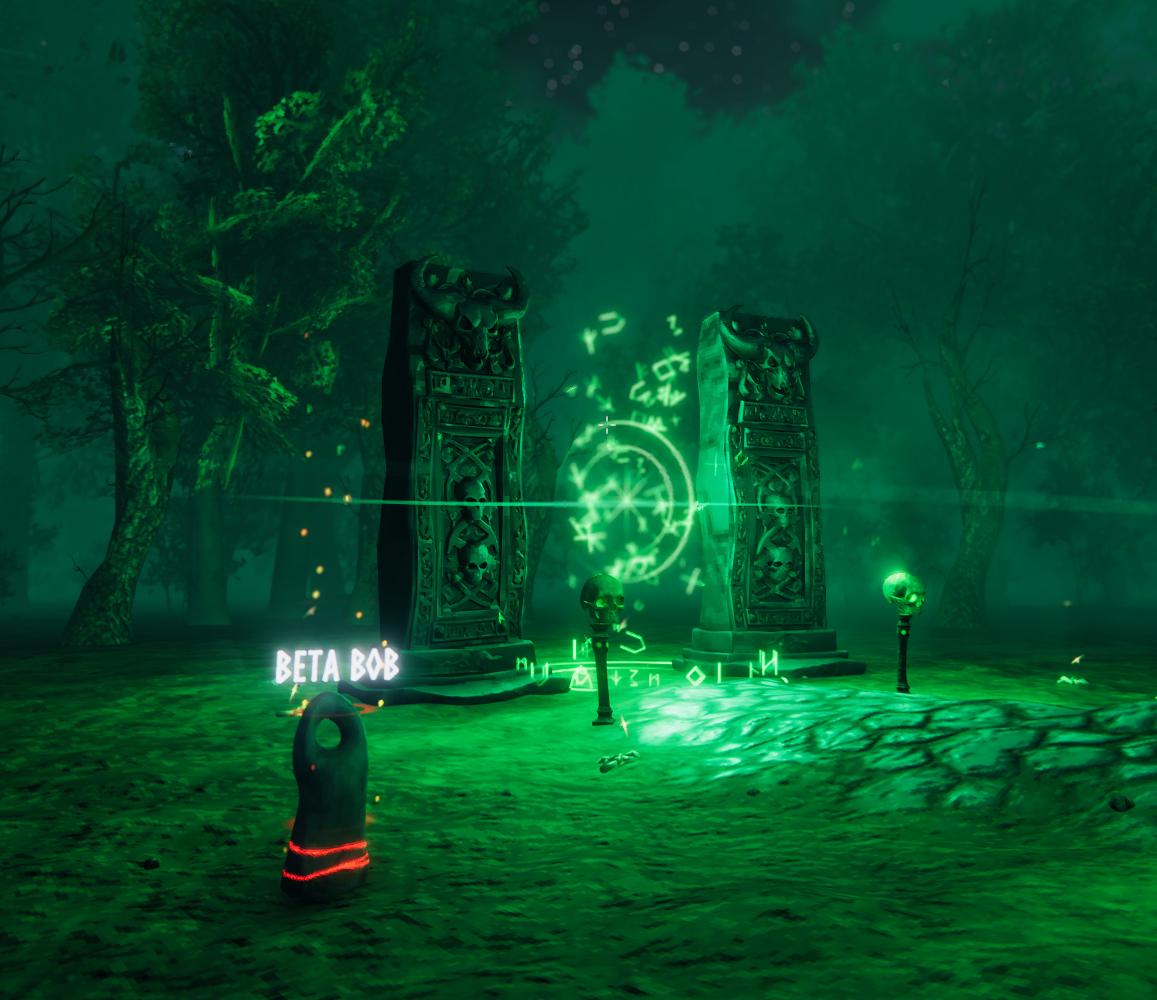
The gateway does not appear gently. Set well apart from your Sacrificial Stones — far enough that the hallowed ground is never disturbed — two vast standing monoliths rise from a cleared and levelled graveyard, and between them burns the gate itself: counter-rotating rune-rings, a veil of green fire, sigils turning on the ground, embers rising into the dark.
- Walk through it. No prompt, no key — cross the threshold and the gate takes you, charging as you step into the light.
- A funeral avenue runs from the stones to the gate, graded level and lined with skull-lights that face inward across the walk, so the green watches you the whole way up.
- The clearing is laid out, not scattered. Leaning gravestones march out in front of the gate — one left, one right, one left — in ordered rows, with half-buried ruin walls in symmetric pairs flanking the flanks. Nothing stands in the avenue, and because the ground is plotted, the dead know exactly where to lie.
- The ground itself is matched to the surrounding land rather than raised into a plateau, cut into the high side and filled on the low, so the clearing meets untouched terrain at its own height on every side — and the temple's sacred stones are fenced off from every terrain edit, so nothing of the gods' work is ever left standing on air.
- A localised gloom hangs over the ground even at high noon. You will feel the dread before you reach the stones.
🪦 Your Grave Joins the Others
Fall in the Mists and your tombstone is spirited back to the gate's graveyard, taking its place among the dead at the entrance. No re-running the labyrinth to your corpse — reclaim your hoard right where you stepped through.
- Never any lost items. The grave is relocated, never destroyed. It always lands on flat, cleared, walkable ground — never in water, never in a cliff, never in the void — and if the graveyard cannot be found it simply stays where you fell. Fully recoverable, always.
- Graves never stack, and never sink. Each fallen Viking takes the next free plot in a laid-out boneyard — rows marching out in front of the gate, alternating left and right, clear of the avenue and clear of the monoliths, seated properly on the ground rather than half-buried in it. Sixteen marked plots — four rows deep, two columns wide, every one of them on levelled ground — before the dead are laid behind the gate instead. 💀
🛟 Your Grave Is Never Lost
Say it plainly, because it is the one promise Avalor makes without exception: you cannot permanently lose a grave.
- Die in the maze, and your grave comes home. The tombstone is moved out of the labyrinth to the overworld graveyard beside the Gate of Two Stones, and takes its place in the boneyard with everyone else who has fallen.
- The grave is never deleted — only ever moved. Even in the rare case where a relocation goes wrong, the tombstone and everything in it still exist somewhere in the world. Nothing about how Avalor handles death is capable of destroying your items; the worst that can happen is that it takes a moment longer to reach them.
- Avalor watches for that on its own. A quiet sweep runs the instant a world loads, and again every minute after, looking for any grave that has fallen out of the labyrinth or ended up stranded on the graveyard clearing, and setting it back down on a plot. Most players will never notice it running — that is the point. It exists so a grave lost to the labyrinth never stays lost.
- It only ever looks at Avalor's own ground. The sweep checks the sky realm and the clearing cut around the gate, and nothing else. A grave you left in a cellar, a mine, or anywhere out in the world is exactly where you put it, and Avalor will not move it, tidy it, or have an opinion about it. The promise above is about the graves this mod puts at risk — the rest of the world is not its business.
avalor_tp_gravealways gets you there. It teleports you straight onto your nearest tombstone, wherever it currently stands, and it asks the server for the true, current answer rather than trusting your own game's memory of where the grave used to be.- An admin can force the issue immediately.
avalor_recover_gravesruns that same protective sweep on demand, right now, instead of waiting for the next automatic pass.
If a run goes badly, the only thing you actually lose is the walk back to collect your things.
🚫 Hallowed (Forbidden) Ground
No one builds in, on, or around the labyrinth or the gate's clearing. Piece placement is blocked throughout the sky maze and within the graveyard's bounds — "The mists reject your works here." The realm stays exactly as the gods carved it.
🕰️ Automated Reset
The labyrinth regenerates on a real-time timer — and it will never reset while a player is still inside.
📊 The Labyrinth Keeps a Record
The server writes a small stats file that BarrkBOT finds and reads on its own — no setup, no configuration, nothing to switch on. It reports what is happening in the labyrinth standing right now (how many have died in it and what killed them, how many creatures are still in there, how many people are inside, whether the Warden still guards the way out, and how many have walked out alive) alongside lifetime totals for the server and for each player, which survive restarts and maze resets.
Only the labyrinth is counted. A death in the overworld is not the labyrinth's business and never appears in the file. Deaths with no creature behind them — a fall off the edge, drowning, a trap — are recorded as the labyrinth itself rather than being dropped or blamed on the nearest mob.
The file lives at BepInEx/config/MistsofAvalor/barrkbot_avalor_labyrinth.json and is rewritten once a minute. Alongside it, avalor_stats_store_<world>.tsv holds the lifetime counters — one per world, so two saves on the same machine never add their dead together; deleting that file resets them.
🌐 Multiplayer-Ready
Server-authoritative generation and a server-only Mob Director keep spawns, vaults and hoards consistent for every peer. Every gameplay setting is admin-only and server-synced, so the server's word is final — no player can quietly clear their own mist or light their own labyrinth. All maze pieces are persistent (they survive logout and relog intact), and every player on the server needs the mod installed.
🚀 Getting Started
- On a freshly generated world, the Gate of Two Stones rises a short walk from your Sacrificial Stones. (On an existing world the area may already be explored — open the console, enable
devcommands, and runavalor_spawn_portalwhile aiming at the spot you want it. That builds the whole site there: levelled clearing, graveyard, and the path back to the stones.) - Walk between the monoliths. There is no prompt. The gate knows.
- Bring a torch. Bring friends. Bring courage. Leave your armour's false comfort behind.
🗺️ Walkthrough
Everything above is what Avalor is. This is what to do.
Pack
- Two damage types. The single most common way a run stalls. Every sub-boss is immune to something, and Vampiric resists all three physical types at once — one-trick builds get stonewalled by a mob they cannot scratch.
- Poison resist. Works on the dart traps as well as the skeletons.
- Max-health food, not regen food. Traps take a fraction of your current health, so how much you are left standing in is decided entirely by the size of the pool.
- A light. Torch minimum.
- Leave the hoard at home. Deaths are recoverable, but they cost you the walk back.
Run it
- Walk between the monoliths. No prompt, no key. Glance at the graveyard first — that is where you respawn-loot later.
- Spend the countdown, don't watch it. Eat, light up, buff. When it says Good luck, the maze wakes.
- Pick a direction and commit. Shallow chests roll the common band only. Backtracking to open one costs more than it pays.
- Clear arenas before looting them. The corner chests are bait — arenas seed proximity spawners that wake while your inventory is open.
- Kill every starred mob you can afford to. Keys drop from sub-bosses and nothing else, and vaults are where the run's real value is.
- Spend keys immediately. Vault chests roll the top band no matter where they sit, and each one hands you a Recall Rune.
- Read the disc, not the walls. Blip on the rim = far. Blip lifted on a stem = the exit is on a different floor, so stop hunting corridors and go find a stairwell. (Only ever happens on Hard and Extreme — Normal is one floor.)
- Heal up BEFORE the disc goes tight. The Warden wakes at ~34m and it will be the first thing you see.
- Fight the Warden in a doorway. It guards rather than hunts — back off far enough and it breaks off and returns to its post, so healing and re-engaging is free.
- Kill it for the greatsword, loot the corpse, then walk into the gate.
Don't
- Don't fight in the open when a corridor is two steps away. Spawns are biased ahead of you, so open ground means surrounded from both sides.
- Don't save your Recall Rune for later. Later is when you are dead. It is a 5-second channel — start it before the fight goes bad, not after.
- Don't panic if the compass points into stone. It gives a bearing, never a route. Walking into a dead end while following it is normal.
- Don't corpse-run. Your grave is already back at the gate's graveyard.
- Don't assume a group is safer. The mob cap is per player, so four of you summons four times the dead.
When it goes wrong
| Problem | Fix |
|---|---|
| Lost, low, deep | Recall Rune — back to your bed, run over |
| Died in there | Your grave is at the gate's graveyard. Nothing is lost. |
| Can't find the grave | avalor_tp_grave puts you standing on it |
| Stonewalled by an immune mob | Swap damage type, or leave it — nothing in the maze must be killed except the Warden |
| Cannot find the exit at all | avalor_tp_end (admin), or reset the maze with avalor_reset |
⚙️ Configuration
(Run the game once to generate the config file in BepInEx/config. All settings are also editable via an in-game config manager. Every gameplay setting is admin-only and server-synced — on a server, the host's values win.)
🧭 MazeComplexity — size & vertical scale
| Complexity | Grid | Floors | Arenas |
|---|---|---|---|
| Normal (default) | 20×20 | 1 | 5 |
| Hard | 40×40 | 2 | 15 |
| Extreme | 60×60 | 3 | 30 |
Applies on the next regeneration.
💀 Difficulty — how hard the dark bites
| Difficulty | Sub-Boss HP¹ | Trap Damage (% Current HP) | Trap Density | Mob Speed | Loot Mult. | Mob Cap / Player | Charred Legion |
|---|---|---|---|---|---|---|---|
| Easy | ×1.0 | 40% | 2% | ×1.0 | ×1 | 5 | — |
| Normal (default) | ×1.5 | 60% | 8% | ×1.15 | ×2 | 7 | — |
| Hardcore | ×2.5 | 85% | 15% | ×1.35 | ×3 | 10 | ✅ |
¹ Difficulty scalar applied on top of the star-level and variant multipliers.
🔦 LightingLevel — torches and darkness, and both apply instantly
Torches are placed throughout the labyrinth at full density and lit or darkened live as you move this dial — so it works in both directions with no regeneration, and turning it up in a maze built in darkness genuinely brings the fire back.
| Setting | Crypt Darkness | Torches Burning | Feel |
|---|---|---|---|
| None | Pitch black | none | Bring your own light. You will lose the walls. |
| Some (default) | Heavy gloom | ~30% | Torches carry the light; dread everywhere else |
| More | Dim | ~62% | Navigable murk |
| Most | Dimly lit | all | See where you are going — mostly |
🌫️ MistDensity — the drifting murk, also live
Governs the fog and the mist volumes standing in the halls, together, the instant you change it.
| Setting | Fog | Mist Volumes Active | Environment Motes |
|---|---|---|---|
| None | none at all | none | stilled |
| Little (default) | faint | ~20% | on |
| Normal | murky | ~45% | on |
| More | thick | ~72% | on |
| Most | blinding | all | on |
⚔️ How hard the labyrinth hits back
Two dials, both admin-only and server-synced, that sit between every creature in Avalor and your health bar. They exist because the maze was one-shotting players who were blocking with 300+ health, and it was doing it without a single damage multiplier anywhere in the mod: stars are a ×2 on damage in vanilla, the Hardcore roster reaches into the Ashlands, and a 6m corridor takes away the one answer Valheim gives you to a big hit, which is distance.
| Setting | Default | Description |
|---|---|---|
| EnemyDamageScale | 0.6 |
Multiplies what the labyrinth's creatures hit players for — applied before armour and blocking, so a raised shield still subtracts its full value on top. |
| MaxHitFraction | 0.5 |
The most of your maximum health any single blow in Avalor can take, measured after armour, blocking and resistances. At 0.5, a player at full health always survives the first hit — whatever swung it, however many stars it had. |
Neither touches the spike and poison plates (those already take a percentage of current health and are written to leave you standing), nor falling, drowning, or anything outside the sky realm. Set both to 1.0 for the old numbers.
🕸️ ClutterDensity — crypt debris
| Density | Effect |
|---|---|
| None | Bare stone. No floor debris, no wall dressing, no hanging banners, no chains — nothing. |
| Normal (default) | Light scatter on the open floor, walls dressed |
| High | Heavier scatter |
| Higher | Well-furnished halls |
| Extreme | Every hall a midden |
Applies on the next regeneration.
🧭 The Exit Compass — a bearing, never a route
A raked overhead disc, drawn in transparent Avalor witch-light: a compass rose lying on the ground ahead of you, seen from 60° above the horizontal, with the way out riding on it. The exit rides inward as you close on it, and an exit on another floor is lifted off the disc on a stem, so "two floors up" reads at a glance instead of as a line of text.
It gives you a direction and a distance and nothing else. It will happily point straight through a wall, and following it into a dead end is the normal experience of using it — the labyrinth is still yours to solve. Turn it off entirely if you would rather be properly lost.
Hold Left Alt to adjust it: drag it with the mouse, nudge it with the arrow keys (hold Shift to move faster), and resize with the mouse wheel or +/-. Wherever you leave it is where it stays.
| Setting | Default | Description |
|---|---|---|
| ExitCompass | true |
Show the compass at all. Local to you. |
| Compass.Size | 190 | Diameter of the disc in pixels. |
| Compass.Opacity | 0.55 | How solid it is. Low values keep it a ghost over the labyrinth. |
| Compass.TiltDegrees | 60 | The angle it is viewed from. 90 is a flat top-down circle; lower lays it further over. |
| Compass.PositionX / PositionY | — | Set by dragging. You should not need to touch these. |
| Compass.AdjustKey | LeftAlt |
Hold to move and resize. |
🔧 Other Settings
| Setting | Default | Description |
|---|---|---|
| MazeResetIntervalHours | 24 | Real hours between automatic regenerations. Never resets with players inside. |
| SpawnPortalAtStart | true |
Raise the Gate of Two Stones near the Sacrificial Stones. |
| DebugLogging | true |
Verbose [Avalor] diagnostics in the BepInEx log. On by default during the open beta — most of what it records happens once while the mod loads, so switching it on after something goes wrong is already too late to capture the cause. Local to you — the one setting that is not server-synced, so any player may diagnose their own client, and turning it off costs nobody else anything. |
🛠️ Admin Commands
Open the console with F5 and enable dev commands with devcommands first — every command below is a cheat command and needs that.
A few of them — the ones that move a grave, forge the maze, or rebuild the overworld site — quietly ask the server to do the actual work if you type them from a connected client, because those things have to be decided by the one machine with the authoritative copy of the world. You'll see the result either way; on a dedicated server, the fuller log of what happened lands in the server's log, not necessarily yours.
| Command | Effect |
|---|---|
avalor_tp |
Teleport straight into the labyrinth (no gate needed). |
avalor_tp_end |
Teleport to the escape gate at the maze's deepest point — a cell short of the Warden's post. |
avalor_tp_grave |
Teleport onto your nearest tombstone (maze or overworld) so you can loot it in place — the surest way to recover a grave. Asks the server for your grave's current position first, so it can't send you to a spot the grave has since been moved away from. |
avalor_recover_graves |
Finds every player grave that has fallen out of the labyrinth or ended up stranded on the graveyard itself, and re-seats it at the overworld graveyard. It looks in the sky realm and on the ground Avalor cut around the gate, and nowhere else — a grave out in the world is left exactly where it is. Runs automatically on world load and once a minute after that; this forces the same sweep immediately. Typed from a client, it asks the server to run the sweep and reports its findings to the server's log. |
avalor_gather_graves |
Moves every player grave in the sky labyrinth to the overworld graveyard, whether it is lost or not — for tidying up after a reset, or for peace of mind. Deliberately separate from avalor_recover_graves, which stays conservative and only rescues graves that have actually ended up somewhere unreachable. Graves already at the graveyard are left where they are, and graves anywhere else in the world are not gathered at all. |
avalor_open |
Cutaway view. Strips floors and ceilings and leaves the wall lattice standing — the labyrinth as a floor plan, seen from above. Pair it with fly. Add walls to strip those too, or off to restore. Local to you only. |
avalor_illuminate |
Toggle full-bright lighting inside the maze to inspect the layout at any hour. Local to you only. |
avalor_spawn_portal |
Raise a Gate of Two Stones where you are aiming — and make it the gate. You get the whole site, exactly as a fresh world builds it for itself: the clearing is levelled, the graveyard is laid out in front of the gate, vegetation is cleared as it streams in, and the processional path is paved back to the Sacrificial Stones if they are within 200m (and at least 40m away — closer than that there is no walk to pave). Everything that looks for the gate afterwards — grave relocation, the return trip home, the check that stops a second gate appearing at the next world load — follows the one you placed. Takes a few seconds; it reports again when the site is finished. Needs a player and terrain that is actually loaded, so run it from a client standing where you want the gate, not from a dedicated server console. |
avalor_spawn_portal bare |
The gate alone, on bare ground — no clearing, no graveyard, no path. Useful for a quick test, but graves relocating there land on unprepared terrain. |
avalor_spawn_portal nopath |
The full site without the processional avenue. |
avalor_spawn_portal replace |
Removes the gate you already have (the designated one wherever it stands, plus any within 150m of the Sacrificial Stones) before placing the new one — this is how you move the gate. World-gen maze-entrance portals out in the Mistlands and Ashlands are never touched. The old clearing's ground is left as it is; run avalor_remove_all first if you want that put back too. |
avalor_reset |
Force-regenerate a brand-new maze now (must be near the labyrinth). Evacuates anyone still inside first. |
avalor_remote_reset |
Force-regenerate from anywhere (for dedicated servers). Evacuates anyone still inside first. |
avalor_remove_all |
Wipe the labyrinth from the sky, remove the gate, the graveyard and the avenue — and put the ground back the way the world generator drew it, so the levelled clearing and the graded path return to the hillside they were cut from. Evacuates anyone still in the maze first. Player graves, chests, anything a player built, and the temple's own altar and stones are always spared. Trees and rocks the site cleared away years ago cannot be regrown — avalor_fix_stones puts the temple's own boulders back. Typed from a connected client, the labyrinth half is done by the server (where the whole world is known) and the overworld half here, where the ground actually is — so run it standing at the temple, and check the server's log for the maze half. Typed anywhere else it removes the objects and tells you the terrain was left alone. ⚠️ This leaves the sky realm completely empty until you rebuild it — don't fly, teleport, or portal up there in the meantime. |
avalor_remove_all keepterrain |
The same removal with the shaped ground left exactly as it is. |
avalor_generate_all |
Cleanly rebuild both the overworld gate and the labyrinth (use after avalor_remove_all). Costs nothing to run if a labyrinth already exists, so it's safe as a general "make sure everything's there" check too. Give it a few seconds to finish forging before walking — or flying — into the maze. Sites the gate automatically near the Sacrificial Stones; use avalor_spawn_portal if you want to choose the spot yourself. |
avalor_fix_stones |
Repair a missing sacrificial altar and/or its flanking boulders. |
🧯 Troubleshooting
My grave is missing.
It isn't — graves are never deleted, only ever moved, and Avalor already has more than one way to get you back to it. In order: try avalor_tp_grave first; it teleports you straight onto your nearest tombstone and asks the server for its true, current position rather than trusting a stale local copy. If that turns up nothing, ask an admin to run avalor_recover_graves — it forces the automatic recovery sweep immediately instead of waiting for its next pass. And give the automatic sweep itself a minute, too: it already runs once when the world loads and once every minute after, so a grave that fell out of the labyrinth in a previous session is often already fixed by the time you go looking for it. (If you died out in the world rather than in the labyrinth, none of these will move your grave — that is deliberate. avalor_tp_grave will still take you to it.)
My grave is at the graveyard, but hovering in the air above it. That was a real bug, fixed in 0.1.10 — the ground under the gate is levelled flat when the site is built, usually by shaving a few metres off a hillside, and the height a grave was set down at came from the land's original shape rather than the clearing that replaced it. Nothing was ever at risk: the grave and everything in it were always there, just standing on a hill that had been dug away. A grave still floating from before the fix sets itself down the next time a player is at the gate, and stays down. No new world, and no command, is needed.
The gateway or the processional road looks like it's floating. Walk away and come back. The ground under a freshly-built site is shaped by a terrain edit that has to actually run once while the site is loaded, and on rare occasions — usually the very first time a site is ever visited — you can arrive a beat before it finishes. It repairs itself automatically the next time the site streams back in, and once it has, it stays fixed for good.
If you are on Valheim 1.0 and the site was built by a version before 0.2.3, the ground was never shaped at all — the game was silently discarding the edit (see the 0.2.3 changelog). It re-shapes itself once on the first visit after updating. If it still does not, look in the log of the machine standing there for [Avalor] terrain: 5 terrain-op prefab(s) registered in ObjectDB; that line missing is the bug, and cancelling TerrainOp lines in the owner's log are its signature.
The road looks bumpy or stepped, like a run of mismatched dirt patches instead of a smooth slope. That was a real bug, fixed in 0.1.8 — the slope used to be flattened in small overlapping patches that could disagree with each other on a server, since they don't always arrive in the order they were made. Every road built before the fix re-grades itself smoothly the next time you walk the avenue. No new world is needed for the fix to take effect.
Mobs in the maze won't attack me first — I have to hit them. That means an out-of-date Shadows of Midgard (anything before 2.0) is installed alongside Avalor. Older SoM doesn't yet know how to exempt Avalorian mobs from its stealth model, so it quietly applies its own alertness rules to them instead — and those rules gate an attack behind being detected first, which the maze was never designed around. Check your log for a line naming Shadows of Midgard directly; Avalor calls this combination out by name and by version rather than staying silent about it. Updating Shadows of Midgard to 2.0 or newer resolves it on its own — nothing further is needed on Avalor's side.
Nothing from Avalor shows up in my log at all — not even at startup.
Avalor has a hard dependency on Jotunn. If Jotunn isn't installed, or fails to load for any reason, BepInEx skips loading Avalor entirely and silently — no error naming Avalor, no warning, just nothing where its startup lines should be. Confirm Jotunn is actually present in BepInEx/plugins, and check the top of your log for Jotunn's own startup output; if that's missing too, that's the problem to fix first.
📥 Installation
Mod Manager (Recommended)
- Install Gale.
- Make sure BepInEx and Jotunn are installed.
- Search for Mists of Avalor → Install → launch through the manager.
Manual
- Install BepInEx and Jotunn.
- Extract the release into
Valheim/BepInEx/plugins/.- e.g.
steamapps\common\Valheim\BepInEx\plugins\MistsofAvalor.dll
- e.g.
- Launch the game.
⚠️ Multiplayer: every player on the server must have the mod installed. 📦 One file. The authored asset kit is embedded in the plugin — there is no separate bundle to copy.
Dedicated Server
The server needs the mod too — it is not optional and it is not client-only. The server is the authority: it owns maze generation, the Mob Director, vault and hoard contents, the reset schedule and the answers to "where is the exit / where is my grave". A server without the plugin has no labyrinth for a client to walk into.
- Install BepInEx and Jotunn on the server, exactly as on a client.
- Drop
MistsofAvalor.dllinto the server'sBepInEx/plugins/. - Start the server once, then stop it — that writes
BepInEx/config/wubarrk.mistsofavalor.cfg. - Edit the server's config. Every gameplay setting is admin-only and server-synced: on connect the server pushes its values over each client's, so the server's file is the only one that decides
Difficulty,MazeComplexity,LightingLevel,MistDensity,ClutterDensity,SpawnPortalAtStartandMazeResetIntervalHours. Editing them on a client does nothing. - Restart. Look for these lines in the server log — they are the proof the server-side pass is alive, and they print whether or not
DebugLoggingis on:
[Avalor][net] topology=DedicatedServer - RPCs registered (SERVER+client handlers) headless=True activeArea=...
Version matching. The plugin declares EveryoneMustHaveMod with Minor strictness, so 0.1.x client ↔ 0.1.y server is fine, and a client on a different minor is refused at connect rather than allowed to half-work. Keep the server on the highest version in use — client and server should always be running the same Avalor build.
The labyrinth on a fresh server. The maze is never pre-built — it is forged the first time it's actually needed. Walking through the Gate of Two Stones asks the server to make sure a labyrinth exists, and the server is the only machine that ever creates one; a client cannot forge its own copy and hand it over. Once the maze exists, asking again costs nothing, which is why avalor_generate_all can safely be used as a general "make sure everything's there" check as well as a post-avalor_remove_all rebuild.
The overworld gate on a fresh server. A dedicated server never loads the Start Temple as anything but a ghost zone, so it cannot site the gate itself — the terrain probing and vegetation clearing need physics it does not run. The first client to visit spawn asks for the job and the server grants it to exactly one machine (portal-siting request from …: GRANTED). So on a brand-new world the gate appears once somebody stands at the Sacrificial Stones, not at server start. This is expected.
Grave recovery runs on the server only, and only over Avalor's own ground. The sweep that finds fallen or stranded graves and re-seats them at the graveyard only ever runs on the machine that is the server — a client's world view can see every grave that exists, but it has no authority to move one, so a client never runs its own sweep. It fires automatically once when the world loads and once every minute after. avalor_recover_graves typed on a connected client asks the server to run that sweep on demand and prints what it found to the server's log, not the client's.
Resets. MazeResetIntervalHours runs on the server clock and only regenerates when the maze is empty; anyone still inside is teleported home first. avalor_remote_reset forces one from anywhere.
🤝 Works Great With
| Mod | Why it pairs well |
|---|---|
| First Person Mode — Azumatt | The labyrinth was built to be walked through at eye level. Dropping into first person turns a 6m corridor into a genuinely enclosed one — the ceiling presses down, the torchlight only reaches so far, and you lose the third-person camera's habit of showing you what is around the corner before you get there. |
🌫️ De-misting mods are fine. Mists of Avalor paints its own fog at render time, after every other mod has had its turn, so the labyrinth keeps its murk even if you run something that strips the mist out of the rest of the world.
🏰 Come Play It With Us
Mists of Avalor is one piece of a bigger table. Wubarrk builds several mods for Valheim, and the labyrinth is best met running alongside the rest of them, not on its own — that's what Wubarrk's modded server is for. Come see how the mist looks when it isn't running solo. Details on joining live on the Discord.
Forged by Wubarrk. May your torch outlast the dark. 🔥
join the Mists of Avalor Open BETA find it only on Hexium
License: MIT — use, modify, and redistribute freely, including commercially; just keep the copyright notice. See LICENSE.md for the full text.